The Sims 3: Very Fulfilled
(+5 skill points => 370/400)
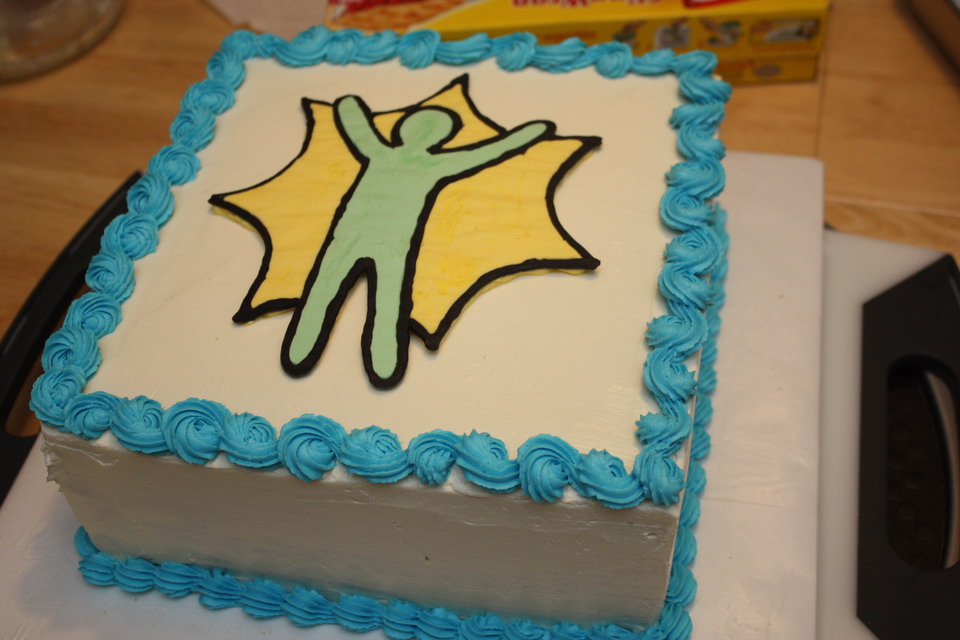
We're doing a lot of over-time to make sure The Sims 3 for PS3 and XBox 360 makes it on to shelves in time. All that hard work deserves cake! The image is my first buttercream transfer and represents an icon seen in game that indicates your Sim is "very fulfilled".
Stats:
- extended Duncan Hines French Vanilla cake mix (2 batches)
- 10"x4" square
- IMBC buttercream transfer decoration
- filled with Jello Cheesecake Cosco-style mousse
- iced with IMBC with a shot of LorAnn "Buttery Sweet Dough Bakery" Emulsion
- shell and reverse shell borders with American style buttercream
I've actually never done a single tier this big before. All of this was done in one night except for the baking. Unfortunately I had to work late that night as well, so I didn't start until 10 pm and went to bed around 2 am.
The cakes were made using
this extension recipe but replaced the normal flour with cake flour. Honestly I couldn't taste the difference. There's probably too little in the recipe for me to really notice. I'm getting bored of this recipe all together anyway, so there may be some scratch cakes in my future.
It's been a while since I've used my 10" square pans, and I underestimated how quickly it would bake up. Each pan used baking strips and a flower nail in the center. An hour at 350 was just a bit too long ... these cakes were probably a little on the dry side.
The first layer was baked a week ago and there was some difficulty removing it from the pan. For the second layer, I cut out a 10" square of wax paper to go at the bottom of the pan before pouring in the batter. I then prepped normally with Baker's Joy spray. Once baked up, I just had to run a knife down the sides and then it popped out beautifully! It's probably important to have a paper barrier for cakes 10" and larger so they don't split in transition from pan to cooling rack. Usually I make 8" rounds and it's never an issue.
This was my first time to make a buttercream transfer. The idea is to copy a picture using piped buttercream and then freeze it in order to be transferred to the top of a cake when firm. My source art was resized and then flipped horizontally before printing on to paper. I taped a piece of parchment paper to a flat, glass candle plate. Underneath the plate is the source art. Underneath that is a dish towel so it could be pressed closely to the glass. This way I could see the art clearly and also I could look under the dish and see if there were any gaps I missed with the buttercream.
I've read that IMBC can be difficult to color darkly ... I concur. I had just a little blob of IMBC but dumped healthy squirts of Americolor black gel and Chefmaster black powder ... achieved dark purple at best.
Luckily dark purple was good enough for me. I outlined my image in black first, then popped it in the freezer to firm up. The lines weren't as consistent in thickness as I would have liked. I used a wet paintbrush to try to even out the icing and press spread some in to the areas that weren't touching the parchment.
Once the black lines were frozen, I was able to fill in the other colored portions easily. The green went first, then re-frozen, then the yellow section. I covered the entire thing with a layer of yellow so the whole piece would be more level (i.e. flat). The pattern was placed in the freezer to firm up.
The only issue was that the plate was so cold, the IMBC firmed up immediately as I piped on to the design. The final result had a few imperfect fill lines. Also notice I forgot to do the background outline in between the guy's legs!
My Wilton 10" square pans are a little disappointing. The sides are slightly angled so my layers needed to be trimmed after I stacked them. Note to self: pay attention while trimming or you'll end up with cutting off more than you needed to! After trimming I crammed some cake spackle into areas that needed some love.
As I said, this is the biggest single tier cake I've ever made. I've made 10" square before, but never this tall. My normal IMBC recipe was barely enough to cover the cake. Unfortunately many areas didn't get covered properly and there wasn't enough to really get some sharp edges going.
This was the best that was going to happen at midnight! Deal with it!
After carefully removing the frozen buttercream design, it was plopped on to the top of the cake. Another note to self: only press down on the frozen buttercream in a few spots ... avoid getting black smudge marks everywhere because you kept changing your fingertip positions!
It was after 1 am when I had to decide if I would make another batch of buttercream for the borders or maybe just run to Walmart and buy a bunch of sprinkles and haphazardly stick them to the sides of the cake. Turned out a Crisco + powdered sugar buttercream was the laziest option. Yet another cake with shell and reverse shell borders!
During this entire process I found myself woefully unprepared for making and transporting a cake this large. I did not have a drum or tile large or study enough for the cake to fit on. I cut out a ~13" square piece of foam core board and wrapped in in freezer paper, then in Press 'N Seal. This alone was not enough to support the weight long-term, so I kept the cake and board on top of a large cutting board while working with it. I didn't have a cake box big enough for this, so it was transported in a left-over food catering box.
People seemed to enjoy the cake. The only problem was that I forgot to remove it from the fridge before serving, so it was still cold :(