or

"Hey, I can do that!"


Sunday, August 22, 2010

The Sims 3

Cakes for The Sims 3 Console Development Team!
(+10 skill points => 365/400) 


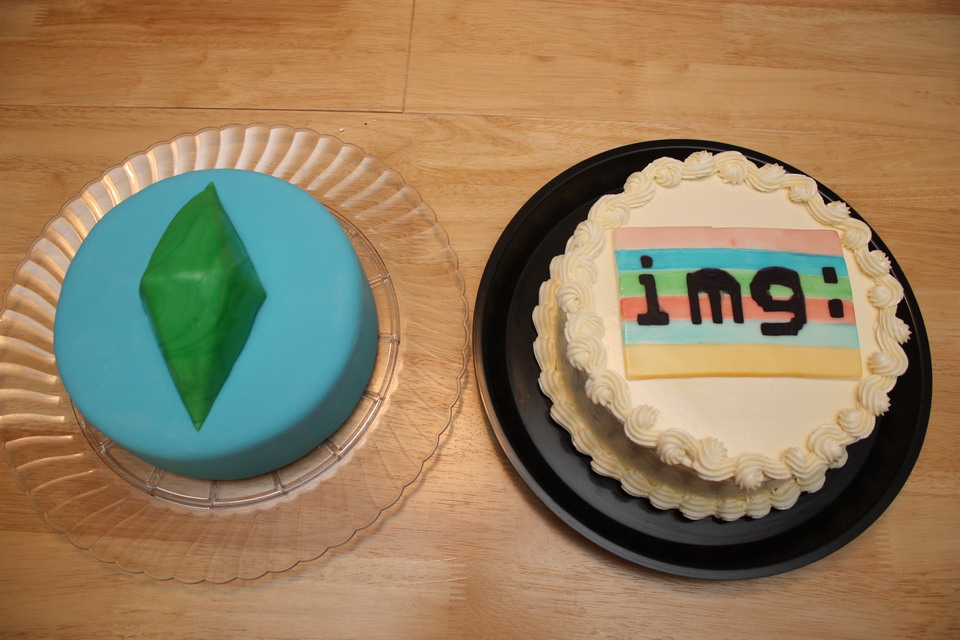
Don't worry if you don't "get" it.  These are mostly inside-joke cakes.  The left cake features the "plumb-bob", a prominent entity in the Sims video game franchise.  The cake on the right features what the Sims console developers see when the game encounters an invalid "thumbnail" texture.  I'm a caker by night, but my day-job is that of a UI programmer.  Our current project is the Sims 3 for XBox 360 and PS3 ... and my team has been working incredibly hard to get this game into a box and out to stores.  Here's my way of giving them a little joy, a few laughs, and excessive amounts of calories.

This actually happened a while ago but I seemingly forgot to post this.

Stats:
  • Betty Crocker Golden Vanilla cake mix in 8" rounds
  • 1 iced and filled with IMBC
  • 1 iced and filled with chocolate peanut butter ganache
  • electric blue fondant (Toba Garrett's recipe)
  • Satin Ice marbled green fondant
  • Cake-ball mix plumb-bob
  • fondant error texture painted with food coloring gels mixed with Everclear
I seemed to be pretty camera-trigger-happy with these cakes, so let's take a trip back through the basics!

 Place a square of non-skid material (e.g. shelf-liner) on your work surface so you cake doesn't slide around.

Put a dab of whatever you're icing the cake with in the middle of your cake board to secure your cake to its base.

Notice cakes may be delicate and rip during pan-extraction.  We'll patch this up later.

Ugly filling lines will also be "fixed".

 This is Toba Garrett's "cake spackle" technique.  Cake crumbs + icing = paste.

Use this as your crumb coat.  Fill in any gaps or gaping holes (e.g. replace missing chunk of cake)

Notice cake is now smooth and whole.

Another dab will do ya.

Still not good at smooth IMBC, but whatever ... these cakes are for free.

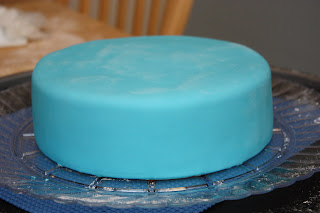
Let's talk about fondant.  In my opinion, fondant should taste like straight up chewy sugar.  Alter it with any flavorings you want, but I have found that butter and cream don't really add much.  In this case, I added a bit of melted white chocolate.  Satin Ice has a chemically taste that I could pick out anywhere.  Not sure how other manufactured fondants taste, but I'll bet good money that I'll prefer the taste of homemade fondant any day.  Here's a mound of blue stuff.


Americolor Electric Blue, to be exact.

Chocolate + peanut butter = darn good ganache

Makes for a good base under fondant too.

 It's been a while since I've covered a cake with fondant.
No complications to speak of.  Love that blue!

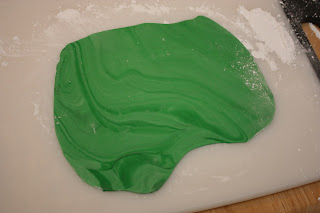
Pause to talk about marbling fondant.  I had never done this before, and probably should have researched it before hand.  I took some homemade fondant (white) and mixed it with some green Satin Ice to make a pastel color.  I mixed that with the straight-up green Satin Ice to marble it.  Note I should not mix.  I should have coiled different colored "snakes" together and only lightly worked them.  What I did blended the colors more than I wanted, but was still good first try.

If you have never played the Sims, the "plumb-bob" denotes what character you are currently controlling.  The plumb-bob is a ... uh ... 12 sided ... diamond shape ... thingie.  I forget the term for this shape, but what I made was actually only half of one, as if it were laying down on length-wise.


This is shaped out of cake ball material.  Cake crumbs + a little icing = rough clay.  After getting the shape I wanted, I stuck this baby in the freezer to firm up.

Covered the plumb-bob, trimmed it, then stuck it on the blue one.


For the texture error, I cut a rectangular piece of fondant and painted rainbow stripes using food coloring gel (Wilton) mixed with Everclear.  Ideally this would have been made of pre-colored fondant strips rolled out together, but it was way too late in the night for fancy.  My co-workers will have to settle for shortcuts.


My cricut cut some clear vinyl in a similar font of what the error looks like.

I filled in the stencil with black-colored IMBC and was not pleased with the results.  My 'm' was very smeared.  After attending the Capital Confectioners' Day of Sharing, I vow to try stenciling again using stiff royal icing instead.


Now to ruin a perfectly fine looking cake.

There.  Now it's funny.


My team seemed to really appreciate the laugh and the cake.  Go, team, go!  We're almost done!

Tyler's 18th Birthday Cake

Tyler's 18th Birthday Cake
(+10 skill points => 355/400)


Happy Birthday to my youngest brother-in-law, Tyler.  I've been super busy lately so this had to be a pretty simple cake ... I didn't even write anything on it!  I'm giving myself 5 points for this cake and 5 points of another cake I made exactly like this earlier but didn't take pictures ... stupid cupcakes have been robbing me of points!

Stats:
  • Duncan Hines French Vanilla with extension 8" round
  • filled and iced with caramel IMBC
  • ganache crumb coat
  • chopped peanuts, mini chocolate morsels, and chopped caramel bits on side
  • reverse shell border on top, shell border on bottom
The overall taste of the cake had me a little disappointed.  Since I've been using an extension/enhancement doctored recipe, I might need to compensate with more flavorings.  This doctored cake recipe yields about 1.5 times what a normal box cake yields.  This makes a taller 8" round that's also more sturdy.

Fast forward a bit (because I forgot to take photos from the beginning).  After making the caramel IMBC, I filled the leveled and torted cakes (baked in 2 8" round pans).  I made a little bit of semi-sweet chocolate ganache ... just enough to be a sturdy crumb coat and add a bit of chocolate.  The inspiration for this cake was a Snickers candy bar, but it kinda fell short.


Man, when I dirty ice, I dirty ice.

I don't think I'm improving much for smoothing and keeping IMBC even.  I do 8" IMBC rounds all the time and have yet to really nail it.  Oh well, this didn't need to be pretty.  Notice I put down strips of wax paper around the base of the cake that will be removed later.


I chopped up some unsalted peanuts and Kraft's Caramel Bits into smaller chunks.  After mixing in some mini chocolate morsels, I had me the base ingredients for a Snickers bar.


Internet research suggested to put down strips of wax paper around the base of the cake before adding chunky side bits.  These will catch the remainders and clean up will be a snap.  A couple weeks ago I made my first cake like this for my co-worker Jon.  The sides had chunks of white chocolate and pecans.  It looked so professional, I had to try this again for Tyler.  It's tricky to get everything evenly dispersed.  Some areas needed more chocolate or what not, so it took several passes to get it right.  I basically held a 1/4 cup of this mix in my palm and gently tipped my hand and held it against the side of the cake, starting from the top.  I wiggled my hand downward to get all the bits embedded into the icing. 


Fortunately I had the opportunity to try a slice of the cake.  The caramel bits were nice, but the rest just really didn't add much to the cake (besides the visual appeal).  I had scraps of Jon's cake and the pecans were so crunchy it was distracting and deterring from the cake.  Oh well.  Maybe straight up chocolate chunks are the way to go.


My reverse shell border was a little different this time.  I didn't form each shell one at a time ... instead just continually piping.  Since the tails didn't taper out, this made shells stand upward more.  Not sure if I like it, but it was definitely faster!


Happy Birthday, Tyler!
Thanks to all my family for letting me practice caking for them.

Wednesday, August 18, 2010

Day of Sharing 2010

Capital Confectioner's "Day of Sharing" 2010


This was my first time at a "Day of Sharing" and also my first time really pitching in for Capital Confectioners, the greater Austin-area cake club.  I had a blast but my legs ached for days afterward! 

Stats:
  • ~120 attendees + vendors + volunteers = ~150 people
  • Wyndham Hotel & Conference Center in Round Rock, TX 
  • 8 am - 5 pm fun-filled hours
  • http://dos.capitalconfectioners.com
I volunteered to be A/V girl.  Apparently there were some mishaps last year that the club really wanted someone dedicated to this part of the show.  Boy, did I learn a lot from doing that!  I have a mental list of all the A/V things that went wrong.  Hopefully people only noticed half of them.  Next time, if given the chance, it'll go much, much smoother!  Many thanks to Jeanette for volunteering to be camera girl for all the demonstrations!

The day started of with a mini-disaster.  I was running a little behind setting up prior to the show.  My length calculations for the composite cords ran too short to offer much wiggle room, so I flew out the door and on to the highway to the closest Walmart to buy extensions.  It was about 8:20 when I got back.  All my wires were running along the front of the room where some people where bustling about setting up vendor booths and what-not.  I busted out my trusty roll of duct tape and started taping down the wires to the carpet so no one would trip.  My first attempts were pilot tapes just to get them in to a good position.  Suddenly someone cries out; I turn around and there's some poor women on the ground!  She tripped on the power strip that was plugged in to one of the floor outlets.  She couldn't get up and her knee began to swell.  I got her a drink of water, helped acquire a bag of ice, and some paramedics were called.  Not sure what became of her, but I like to think she was eventually ok.  She was so cute; she didn't want to leave.  She said she came here for a cake show and intended on staying!

When I wasn't scurrying around, I tried to pay attention to all the lovely demonstrators and what they had to share.  First up was Brian Stevens.  He showed us how he did the internal structure and how he painted the Gollum cake that created earlier this year for the "That Takes the Cake" cake show/competition.  This show cake won 2nd place.


Next was Ximena Sempertegui who showed us how to make an ADORABLE christening outfit from fondant.


Up next was Marco Antonio Lopez Sanches and another lovely lady (I didn't catch her name) demonstrating techniques for stenciling and also creating the most beautiful and delicate looking flowers.  They didn't speak English so we had a translator explain what they were saying.  Below is a stencil she showed us using royal icing and disco dust.  When she peeled the stencil away, almost everyone said "wow" or "ahh" out loud.


Last but certainly not least was Stephen Benison and his line of intricate and unusual cutters.  It was funny during his demonstrations because for some cutters the audience (myself included) didn't have a clue where he was going, how it would look, or what would turn out ... and then he'd suddenly flip something here or twist something there and flair the edges out ... and then came the "aaaahhh"s.  He sold out of the products he brought quickly.


We served everyone breakfast and lunch, including this wonderful dessert bar:


On display in the lobby were lovely and whimsical cake/sugar designs from Jeanette and Kimberly.


AND there were raffle PRIZES!  I even won something!  I put plenty of tickets in to a box to make sure I got Mike McCarey's DVDs that he graciously donated to the club.  Sucks that I didn't win the airbrush set though!  The heavy hitters of the raffle prizes included a KitchenAid mixer and a Cricut Cake.

This adorable winner said she's giving it to her mom!


Perhaps the best part of the show was when Kyla presented Irene the "Heart of the Club" award for all her efforts towards the Capital Confectioners.  She was so surprised and touched, we squeezed a few tears from her and some of the audience members!


Plus a nice gift card!

View all my photos of this wonderful day here:

As Seen On

As Seen On Capital Confectioners