or

"Hey, I can do that!"


Showing posts with label cake balls. Show all posts

Monday, December 6, 2010

Austin Cake Ball Class

Austin Cake Ball Class


For my birthday I specifically asked hubby if I could take a cake ball class taught by Austin Cake Ball.  I finally had the opportunity to go to the big Whole Foods downtown and learn in their lovely classroom.  

Stacy Bridges and Rafael Cisneros showed us how they make their wonderful creations.  I've made cake balls before but it was a great opportunity to watch how the pros do it and to hear their ideas and techniques.


I could definitely use some more practice!


Maybe everyone will get cake balls for Christmas!

Saturday, October 23, 2010

Breast Cancer Awareness

Breast Cancer Awareness


October is Breast Cancer Awareness month!  Remind someone you care about.  I had an itch to bake but not a lot of time, so I made pink cake balls and cake pops for the ladies at my work and reminded them to check their boobies.  

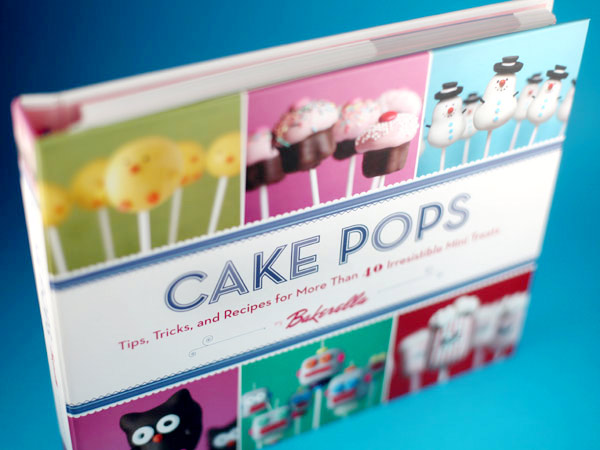
Bakerella has just released her new Cake Pops book and I watched her promotional video on how she makes her little darlings on sticks.  Mine definitely didn't look as good as hers.  


I've signed up for cake ball classes at the downtown Whole Foods given by Austin Cake Ball.  Hopefully I can learn to churn out some decent looking treats just in time for Christmas.

One cool thing that came out of this was my new pop board.  We've got a lot of scrap wood lying around in the garage and this one finally came in to use.  I drilled 3/4" deep holes 2" apart (you can see my pencil marks because I couldn't decide at first where to put them).  A lollipop stick can fit into each hole, allowing a cake pop to dry safely.


3/16" drill bit made the perfect size

I melted some white candy wafers and mixed it with red powder food coloring.  This wasn't the exact shade of pink that I wanted, but it'll have to do.


I didn't use my food processor to make cake crumbs, and I think that was a big mistake.  My balls came out lumpy!  Here they are, looking like unappetizing meatballs.


This my first attempt at making cake pops.  Unlike cake balls, I think pops need more binding and longer time in the freezer.  I had so many fall apart when dipped into the candy melts.  I tried using some melted Nutella as my binder, but I really should have just whipped up a batch of buttercream and used that. 


My hot mess.

Much prettier when dressed up.

Bakerella's trick of dipping the stick into the melted candy before inserting it into the ball was great.  Be warned!  These babies will fall of the stick while you eat them.  Perhaps my balls are too big :b  I've got a lot to learn and am excited about my upcoming class.

Sunday, July 25, 2010

Cake Ball Strawberries

Cake Ball Strawberries


I had the honor of co-hosting a baby shower for my brother-in-law and his girlfriend.  They are expecting their little girl in September.  Their nursery theme is watermelons and strawberries, so we decorated my mother-in-law's house to match for the shower.  I finally had an excuse to try out this idea that had been rolling around in my head.

Stats:
  • Duncan Hines Red Velvet cake mix
  • splash of Coffee Mate's Vanilla Caramel coffee creamer
  • white chocolate colored red
  • fondant calyx
The tutorial for making cake balls will have to come another day.  I was slightly pressed for time and couldn't take all the pictures I wanted.  Essentially, I baked up a normal 8" round of red velvet box mix.  After it cooled, chunks of it went inside my itty-bitty food processor (I really need to buy a new one).  It took several passes to grind up the entire cake, but eventually I was left with a bowl of beautiful deep, dark red crumbs.

Typically I mix in some left over icing as a binder, but I forgot to make my icing (for cupcakes) before doing this.  So I tried using coffee creamer (as many have suggested on cakecentral.com).  Not sure where my French Vanilla went, so the only thing I had was Vanilla Caramel.  These are the liquid creamers that you keep refrigerated.   Only about 2-3 oz. of this stuff went in since the cake was already pretty moist.

I shaped clumps of crumbs with my hands until they looked like a strawberry.  Best thing at this point was that strawberries normally don't look perfect anyway.  When all the crumbs were gone, I had a couple trays of cake balls.  A flat toothpick was inserted into each one where the calyx would be.


These were put in the freezer for about an hour.


A while back I bought some red powder food coloring.  After melting several boxes of Baker's white chocolate, I mixed some coloring until I got a deep pink.  Buying Wilton's red candy melts would have been simpler, but I thought this might taste better.


+


=


It took a while to get a groove going when dipping these little darlings.  I tried using a fork and a spoon, but the best way I found was:
  • hold cake ball firmly by toothpick
  • insert cake ball into melted chocolate
  • rotate cake ball slightly until the entire thing has been covered by chocolate
  • very slowly extract the cake ball straight up
  • as it is being pulled up, vigorously wiggle or spin the cake ball (the excess chocolate will slide down into the vat easily and evenly)
  • lay on its side gently, holding it in place for a moment while the chocolate smooshes against the surface and thickens

The strawberries were left on the table overnight so they could firm up.  The next morning I topped and packaged them up.

I had a batch of marshmallow fondant (MMF) for covering cookies.  I mixed some of that with an equal part of Satin Ice green fondant so I could get a yummy taste and a light green color.  My Wilton Course 3 Student Kit came with a calyx cutter that was the perfect size.


I heated up the left over pink chocolate.  Carefully (otherwise I'd smear the chocolate), I picked up the cake ball and put it inside a little baking cup.  I slid the toothpick out, which kinda broke off some crumbs.  With a chopstick, I put a dollop of melted chocolate over the hole that the toothpick made and then stuck the calyx on top.


I had so much fun making these.  They made it to the shower intact with only a few problems.  Unfortunately, it's July in Texas.  The temperature changes from going from house to car to house made the chocolate a little funky.  I don't know the term for it, but some areas developed light-colored spots.  The baking cups got a few grease spots. 

When I brought them over, the house was a buzz with setting up for the party.  At some point, my mother-in-law tells me that she brought out a glass serving plate for my strawberries.  I had to say, "Oh, those aren't strawberries ... that's CAKE."

Everyone loved them.  Unfortunately, they were all gone when the party ended ... I had to take home my less popular left-over desserts.

Tuesday, January 12, 2010

White Almond Sour Cream Cake (WASC): attempted

White Almond Sour Cream Cake
... Without the Almond ...
... Oh and with a Package of Vanilla Pudding ...


For my 3D/sculpted cake entry in the upcoming cake contest, I needed a firm, fine crumb cake to carve.  Several decorators on cakecentral.com recommend the famous White Almond Sour Cream (WASC) cake recipe for carving ... well, heck, for anything.  People rave about this cake.  Some cakers say it's practically the only recipe they bake.  I had to see what all the fuss was about.  Unfortunately, I had to doctor the recipe so this post isn't 100% ... hence the "attempted" tag.

1.5 batches of this recipe was made, which is actually a LOT of cake.  The first batch almost overflowed my KitchenAid!  I kept cringing at every additional ingredient as it went into the bowl, hoping I wasn't going to end up with a batter-covered counter.  A package of vanilla pudding mix also went in (a suggestion made for extra firmness in a cakecentral.com post about carving WASC).  I had enough to fill 2 8"x3" rounds, 1 7"x3" round, and 2 6"x2" rounds.


All the pans went into the oven at the same time, but the 6" rounds came out early.  If memory serves me right (which it does not necessarily do), everything was done after an hour and a half.


My poor 6" round suffered the most deformation.  One side was very fluffy and stuck to the pan.  It also peaked high in the center.  I used baking strips on all of the pans ... maybe next time I'll have to use flower nails too.


But they do look delicious, don't they?  The outside was a nice golden color.  The inside would have been whiter if not for the pudding mix.  It ended up looking somewhere in between white and yellow cake.  Torting it really shows how a nice and fine the crumb is.


The cake was firm, but not too firm or heavy.  It had a nice density and was pretty good for carving.  Here's the 7" and 8" rounds torted, leveled, and stacked.


My edges unfortunately baked up a little hard.  After watching me struggle with my serrated bread knife, my husband suggested we buy an electric carving knife for when I have to do this all over again.  We found a $10 one at HEB.  I'll let you know how that goes later.


This was also my first time using Indydebi's buttercream.  I'd love to try that recipe again on a regular cake.  So far it has performed very well for me.  The recipe was simple, it was easy to work with, and it got a nice crust.  The taste, well, it tastes like regular ole buttercream.  Nothing blow-your-mind new, but a good, safe taste.


After leveling and carving the cake, I had a considerable amount of scraps.  I made cake spackle for the first time (a technique in Toba Garrett's book The Well Decorated Cake).  The scraps were thrown in to my little food processor, pulsed with "Grind" mode.


This produced very consistent crumbs ... I don't know why I bothered using anything else for making cake balls!


Spackling my cake was fun!  I used it to build up in areas that needed more cake.  This is definitely a handy technique.  Toba suggests covering whole cakes with spackle before icing.  My contest entry will most likely have a layer of it.


Well, not all of the scraps went into spackling.  Like I said, that was a LOT of cake.  And what do you do with left over cake?  Make CAKE BALLS!!!


This time I used Baker's semi-sweet chocolate.  It melted in the microwave nicely, and I finally got to use my new candy dipping tool.  These were by far the prettiest cake balls I have ever made.  I even put them into little individual candy cups (they look like mini cupcake wrappers) before setting them out on the "taco table" at work.


I'd like to try cake balls with more expensive chocolate, like Ghiradelli ... but I not made of moneyz.  Maybe I'll have an excuse in the future to splurge.

Oh I should probably mention how the cake tasted.  It's hard to say what was WASC and what was vanilla pudding.  Oh I should probably mention how I didn't add almond flavoring ... so it was more like WSCVP.  Anywho, it tasted good to me.  My favorite Duncan Hines cake is "French Vanilla", and it tasted pretty close to that.  I realize, though, that not having almond and adding the pudding really kinda removes all the features of WASC.  The cake is no longer white ... it's yellowish.  White cake is also pretty light and fluffy (because it's egg whites without the yokes) ... and adding pudding weighed it down a lot.  The sour cream was to make it moist ... and I don't know how much of the moisture factor was sour cream or pudding.

In the future, I will have a true 100% WASC cake post so I can have a fair tasting ... as soon as I find my bottle of almond flavoring ...


Tuesday, November 3, 2009

Cake Balls: Completed with Badge

Cake Balls I'm actually proud of!
(+5 skill points -> 175/400)


After Halloween, no one wanted to take any cake home with them.  I was stuck with 2/3rds of a cauldron cake!  I also had a lot of left over red velvet cake from the Dragon Age Congratulations cake.  Cake balls is the best way to get rid of scraps.  I learned that I can use my Oxo Good Grips Dough Blender for crumbling the cake and mixing in the icing ... which is awesome because I had yet to use that thing for anything else!


Unfortunately I don't have any photos of what happened to the cauldron cake.  Those cake balls got dipped in Wilton's red candy melts.  My husband loved those!  I don't own a double boiler, but I wanted to try using my little crock pot to heat the candy melts.  I've used it before for chocolate fondue.  It actually worked well, I think.  The bad thing was that the candy melts were so thick!  The cake barely survived being dipped in it.  I even added a lot of shortening and vegetable oil to make it thinner, but I'm not sure how much that helped.

The chocolate was the complete opposite.  It was the oiled chocolate fountain chocolate I used before in my first cake ball attempt.  The red velvet cake was dipped in this, but never "set" (see photo above).

I thought both tasted yummy!  When I took them to work, I called them "Tainted Darkspawn Blood Drops" (from the Dragon Age video game).  It was a hit!  Here are some of the responses I got:
Wow Chris,
The tainted darkspawn blood drops are sooo good!
^_^ Thanks,
- James
holy cow those blood balls rock 
excellent job chris
- Stacy
The chocolate ones are on the top ten list of best things on the planet! I think it helped that they didn't set. :)
- Nancy

Tuesday, October 27, 2009

Cake Balls, Practice Run: Completed

Cake Balls
Practice Run
+5 skill points -> 155/400


The practice cake I made on Sunday yielded some high domes that had to be leveled off.  Originally these were saved for my husband to snack on, but he's too busy playing video games to notice.  Instead, I decided to do a few cake balls!

I crumbled the cake and mixed in about 2 Tb of cream cheese tub frosting.  One post on the cakecentral.com forums said that the mixture should look like cookie dough.  When I achieved that consistency, I scooped some out with my cookie dough spoon!


The scoops were rolled into a ball using the palm of my hands and were then placed on parchment paper.


I let these set in the refrigerator while I did some chores, maybe <20 minutes.  Then I popped them in the freezer while I microwaved some chocolate.


I've got a ton of chocolate left from a failed attempt to run a chocolate fountain.  Have you ever seen a chocolate fountain?  It's one of the most beautiful sights ever :)  This chocolate was for a baby shower, but once we got all the chocolate in, the fountain quit working after only 5 minutes.  So I definitely have chocolate to spare.  There's a significant amount of vegetable oil in this chocolate, so it has a very thin consistency (necessary for use in a chocolate fountain).  I really can't use this chocolate for anything else except dipping things in or drizzling on to stuff (like my practice cake).

I stuck a toothpick in a ball and dipped it in the chocolate, covering every part of it.  I held it up and let some chocolate run off, then I transferred it back to the parchment paper.


There was a hole left where the toothpick was, so I drizzled some chocolate in it to cover it up.  They are now sitting on the kitchen table ... I'm going to go try one ...

Hmph, the chocolate hasn't set yet.  You know, this chocolate might not be solid at room temperature with all the oil in it.  I'm putting the balls in the fridge.  Perhaps I should leave one out to test ...

UPDATE:
Let's call this a fail, but I learned a lot.  My cake balls were way too mushy.  I suppose I put too much icing in?  Here's what the mixture should have looked like (and if it were red velvet cake):
http://www.flickr.com/photos/pioneerwoman/2984701665/

I am determined to try again!  I want to make some yellow covered spice cake balls for Halloween.  I'll let you know how it turns out ... it should NOT look like cookie dough.

Sunday, October 4, 2009

Cake Balls!

Last Saturday I attended the lovely wedding of my friends Hang and Sandi (see the engagement cake I made for them here).  They had an awesome cake ball groom's cake.

NOT MY CAKE


He's a UT fan but for some reason USC is winning (according to the little fake score board).  The whole setup was a real crowd pleaser.  The groom later told me that the cake decorator was so proud because this was the first stadium she made (it looked to be constructed with wood and cardboard) and it turned out so well.  She requested any photos so she can advertise with it on her website.  The stadium will be reused in many occasions to come!

The groom said unfortunately the bride and groom cake balls were accidentally left off of the display.  The groom ball had a tux and the bride was in white.  The football player balls had little fondant helmet guards.  I was lucky enough to taste 2 different cake balls (from the "crowd"), one carrot cake and one banana cake.  They were delicious!  I just had to know how to make these bit-size bits of heaven.

Here is an absolutely wonderful tutorial for making cake balls from www.thepioneerwoman.com:


She makes spooky Halloween treats in this post.  I really appreciate all the photos and in-depth information in her tutorial.  I'm so excited ... just need a good excuse to make some ...

As Seen On

As Seen On Capital Confectioners