
That Takes The Cake
8th Annual Sugar Art Show and Cake Competition
February 25th - 26th, 2012
Austin, Texas
Division: Adult Advanced
Category: Special Techniques
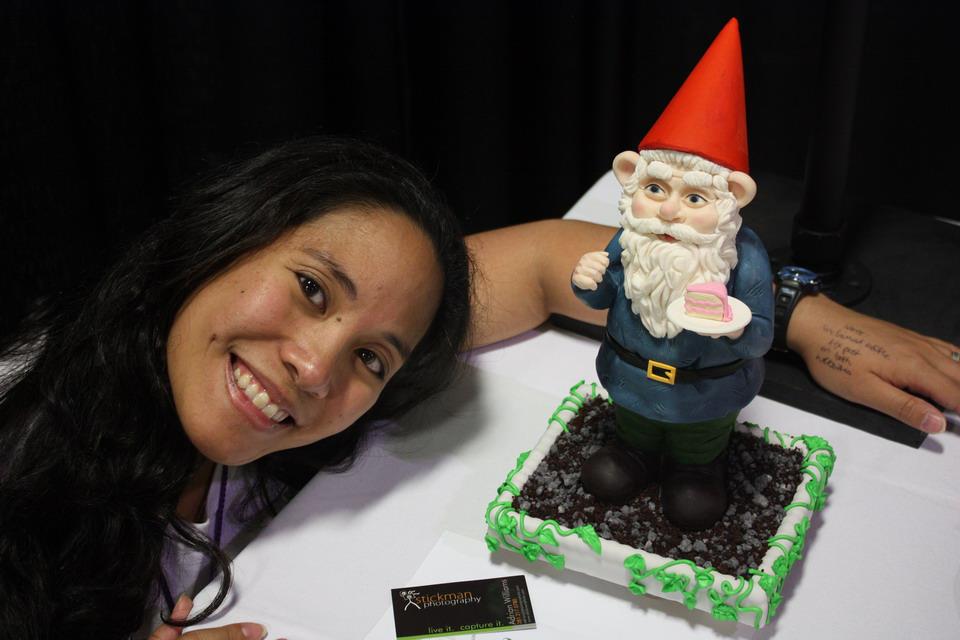
Title: Gnome with Cake
8th Annual Sugar Art Show and Cake Competition
February 25th - 26th, 2012
Austin, Texas
Division: Adult Advanced
Category: Special Techniques
Title: Gnome with Cake


This is the most intensive cake project I have ever done. Unfortunately he did not win any awards, but I'm really quite proud of myself and this little guy.
Of course I'm disappointed that I didn't place, but jeez, look at my competition! The dragon took 3rd, the lilies display 2nd, and the orchids were 1st.
Adult Advanced Division
Special Techniques Category


Like always, I had a blast at this year's show. There were so many amazing cakes! Since I reduced my volunteer hours, I got to enjoy the show thoroughly ... I think I have a picture of every single competition entry! Coming soon is a separate blog post about the show. Now here's me blah blah blahing about what I did ...
Stats:
- Total time spent: >40 hours
- base is a particle board (old shelf)
- 3/4" galvanized metal floor flange ($6.72)
- 3/4" x 12" PVC riser (for lawn irrigation) ($1.34)
- #8 x 1/2" screws
- bamboo skewers
- 18 gauge floral wire
- Tylose gumpaste
- gnome was mostly sculpted modeling chocolate
- gumpaste accessories (hat, belt, planter)
- "soil" - dehydrated cake crumbs and Carbon Dulce
- "planter" - gumpaste bead border covered with rolled gumpaste
- "vines/leaves" - royal icing
Ever since last year's competition, I've been kicking around the idea of making a garden gnome. This was not my first choice for this year's competition, but since I'm pregnant I wanted to limit myself to something less ambitious than what I had originally wanted. The garden gnome "let's do it!" decision was made after shopping at Hobby Lobby one day and seeing a whole display of gnomes and accessories. They are so cute! After thinking it over for a few days, a went back to pick out my gnome. Here he is:


Work Log:
01/30/2012, ~1 hour
- hubby and I cut the base board
- drilled screws to board to secure flange
- drilled holes in PVC for cross bar armature

The metal flange was attached with 1/2" screws. My gnome needed some kind of armature that could support weight horizontally, so I drilled some tiny holes into the PVC pipe to insert bamboo skewers. Thankfully drilling into the PVC went well!
01/31/2012, ~1.5 hours
- added foam core to base
- made batch of gumpaste
- rolled and cut gumpaste tiles
Last year, I had difficulties trying to build my cake over the flanges. Instead of compensating and compromising my figure, I decided to build up the base around the flange. I cut out a circle from 1/4" thick foam core and placed the board over my base, trimming the sides to fit neatly on top. Now, if I like, I can decorate my base and start building my figure flush with the bottom!


I made a batch of gumpaste using soft peak royal icing + Tylose. It took a long time to knead and there were little chunks of powdered sugar throughout the batch. I really need to sift my powdered sugar before using it instead of just dumping in the whole bag. Using my KitchenAid pasta roller at setting 2, I rolled out some gumpaste and cut several circles to use as practice tiles. These will help me figure out how to control my paint on gumpaste and try techniques without having to risk doing something that doesn't work on my entry.
02/01/2012, ~1 hour
- sculpted rice cereal treat interior


02/02/2012, ~1 hour
- initial layer of gumpaste


02/04/2012, ~1 hour
- colored gumpaste
- prepared tools


I colored some gumpaste to match the black, blue, and green parts of my reference gnome. I used Americolor gel paste: super black, chocolate brown, navy blue, and leaf green.
02/05/2012, ~1.5 hours
- added to armature
- gumpaste fail
- colored modeling chocolate
Disaster! His pants fell off! I tried to apply my green gumpaste to sculpt his pants, but it just wasn't working. The gumpaste didn't stick to the initial foundation, the gumpaste didn't stick to itself, the gumpaste wouldn't smooth out, the gumpaste started to stretch and his pants started to fall off ... I was so upset, I tore it all off and had to reset myself. I decided gumpaste wasn't going to work and pulled out some old modeling chocolate from my pantry, colored it green, and let it rest. I'll try again later and see if it works.
02/07/2012, ~2 hours
- sculpted pants
02/08/2012, ~1 hour
- made and colored modeling chocolate
02/09/2012, ~2 hours
- base foundation of his coat
- sculpted boots


02/11/2012, ~1.5 hours
- made and colored modeling chocolate
- sculpted coat ends
02/12/2012, ~1 hour
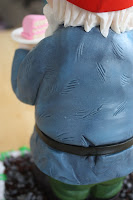
- carved indentations for his belt
- sculpted most of his coat
02/15/2012, ~3 hours
- sculpted head
It's truly inspiring! Unfortunately I'm no where as skilled as that. It took me 3 hours to sculpt my gnome's head. Just the flesh parts, not the beard! He looks pretty freakish without the hair because I wasn't sure what he should look like underneath and I was just trying to build up some foundation for the beard to go. I think he looks like Yoda crossed with Dopey from Snow White. I tried making his eyes by hollowing out the eye sockets, sticking in a white ball, and covering it with flesh colored eye lids, but that did not work. Perhaps if they were bigger or if I had teeny tiny tools, it'd go better. I gauged his eyes out and stuck in a lump of flesh and just carved the eyes out.


My metal tools were wonderful. I could smooth out and carve easily, but I did find it difficult to scrap modeling chocolate away. It's different there than clay, and just clumps and clings to the tools whenever I tried to scrape.
02/16/2012, ~1.5 hours
- made hat
- prototyped plates


My reference gnome is holding a bird in his left hand, but I want mine to be holding a small plate with a slice of cake. I cut out a prototype from cardstock to get my desired sizes using a cutter and the end of one of my large piping tubes. I cut a small circle out of gumpaste, then a larger circle. I covered the smaller circle with the larger, trying to create an indentation so it wasn't just a flat plate. Once it dries, I'll turn it over and see how I like it. I don't think it's exactly what I want, but I haven't come up with a better solution just yet.
The recipe for gumpaste I've been using says to refrigerate it ... now I know why. My gumpaste had mold growing on it! Luckily it's not for eating.
02/18/2012, ~6 hours
02/18/2012, ~6 hours
- sculpted beared
- patched hat
- airbrushed hat
- sanded gumpaste plate
- sculpted cake slice
With some red royal icing, I smoothed out the seam in his hat and tried to even out the rim. I busted out my airbrush and compressor and put on several layers of AmeriColor "Holiday Red". It's a pretty, bright red. Hopefully it won't class with his other colors.


The other day I wasn't really happy with the gumpaste plates, but I like them a lot more today. They dried nicely and I was able to sand them smoother with a scrap of sandpaper. I have 3 plates, so I'm going to try to coat one with "edible varnish" and leave the others matte to see which I like best.


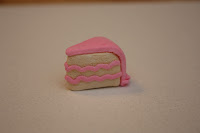
I had some fun making little slices of birthday cake! I colored gumpaste ivory for the cake part, and made some pink for the icing. I used some sort of drywall scrubber to make texture on the cake. With my extruder and the smallest hole plate, I made skinny pink ropes. After some practice, I made a 3 layer cake filled and iced with pink icing. Since it looked so plain, I tried different techniques to make it look like it was piped along the border. I ended up coiling gumpaste around a toothpick and glued it to the bottom of the slice while making the coils slant. It doesn't exactly look liked piped buttercream, but it's still neat.


I had some fun making little slices of birthday cake! I colored gumpaste ivory for the cake part, and made some pink for the icing. I used some sort of drywall scrubber to make texture on the cake. With my extruder and the smallest hole plate, I made skinny pink ropes. After some practice, I made a 3 layer cake filled and iced with pink icing. Since it looked so plain, I tried different techniques to make it look like it was piped along the border. I ended up coiling gumpaste around a toothpick and glued it to the bottom of the slice while making the coils slant. It doesn't exactly look liked piped buttercream, but it's still neat.
02/19/2012, ~4 hours
- sculpted more hair
- attached hat
- gave him irises
- built up waistline
- sculpted hands and arms


The airbrush paint on his hat finally dried completely, and I was able to attach it to his head with some royal icing. I first had to put down some more hair to get his hat to fit snuggly, but it looks great! Well, except for the seam at the back. During a dose of insomnia last night I figured out that I can make the seam look intentional if I add some "stitching" to it ... like the gnomes sew up their hats roughly. I can add more stitching around his coat, too, so it will look more consistent and give it more character.

His irises are little blobs of the navy modeling chocolate from his coat. He still looks creepy, though, without pupils. I'll let the irises "set" before adding those. My model reference also has painted brown eyeliner ... perhaps I'll paint on some chocolate to his upper lid as well.
At some point I need to give this guy a belt. Previously I had made a deep grove for where the belt should go, but I decided I took away too much. I put back some navy clay and built up a flat base for the belt to sit on.


Any artist will tell you that doing hands is hard. Sculpting tiny hands out of chocolate is no exception. I used my own hands as reference several times. At first I thought his left hand would be easy because it would be obscured by the plate of cake. I did a rough pass and then put the plate on top and was dismayed to see how much of his hand was visible. I had to add a lot more detail to the underside of his hand ... which is not easy for a preggo to do. I've found that sitting upright and working close to my competition entry makes my feet swell.
02/20/2012, ~1.5 hours
- sculpted sleeves
- added belt
I made a long list of polish items that I'd like to do for my entry if I have time (and don't go into labor). The closer he is to being complete, the less happy I am with him. His coloring looks to flat ... he doesn't look jolly enough ... I want to look at him and have him make me smile (like his model reference does), and somehow I've lost that lovin' feeling.
02/21/2012, ~2 hours
- painted belt
- made buckle
- lined base board


It went on dark and glossy and didn't take forever to dry. His buckle is also gumpaste colored with gold luster dust + Everclear.
Not sure if my idea for the base board border is going to work, but since I haven't come up with anything better, I needed to go for it. Using my Wilton bead mold, I lined his board with gumpaste glued on with the Tylose glue.


Hopefully tomorrow I can sand it down a little, smooth out the edges with royal icing, and cover it with more gumpaste to simulate a concrete garden border. My parents' house had these and it makes me sad to remember them (my folks have sold their house and retired to the Philippines).

02/22/2012, ~1.5 hours
- made base border
02/23/2012 - 02/24/2012, ~7 hours
Ok, the last couple days were a bit of a blur. I took that Thursday and Friday off of work to concentrate on finishing my entry and also allowing time to volunteer at the show.
- dusted with color
- added pupils
- piped vines and leaves on planter
- repainted belt
- painted makeup
- glued plate and cake
- added soil and gravel
On Thursday I hit up my local Hobby Lobby and bought several vials of Wilton's Color Dust. I don't usually dust my work, so I'm not sure if these products were good or not as compared to, say, CK Petal Dust. What I noticed immediately was that the powder was itself was inconsistent. Some of it was like dust, some clumped into little balls. I poured a little bit at a time into a disposable plastic cup to work with. I had to break it up using my paintbrush before applying it. The other bummer was that there were clumps of white coloring, most noticeable in my red. If I didn't break up the dust, I risked applying streaks of white. My gnome's hat was almost irreparably colored with white streaks.


I dusted his cheeks, nose, ears, tongue, and hands pink. His beard was dusted with a mixture of brown and white for depth. His eyeliner is melted chocolate applied with a tiny paintbrush.
I ended up re-painting his belt using AmeriColor Super Black mixed with Everclear. The original coat of AmeriMist Black somehow ended up with a green sheen. I had to use this black paint anyway to help give him shinier black gumpaste pupils.

I ended up re-painting his belt using AmeriColor Super Black mixed with Everclear. The original coat of AmeriMist Black somehow ended up with a green sheen. I had to use this black paint anyway to help give him shinier black gumpaste pupils.


I used the Tylose glue to secure the plate to his hand and also the cake to the plate. I like how the Tylose glue is clear ... you could see a little of it on his fingers if you looked hard enough, but it was mostly invisible.

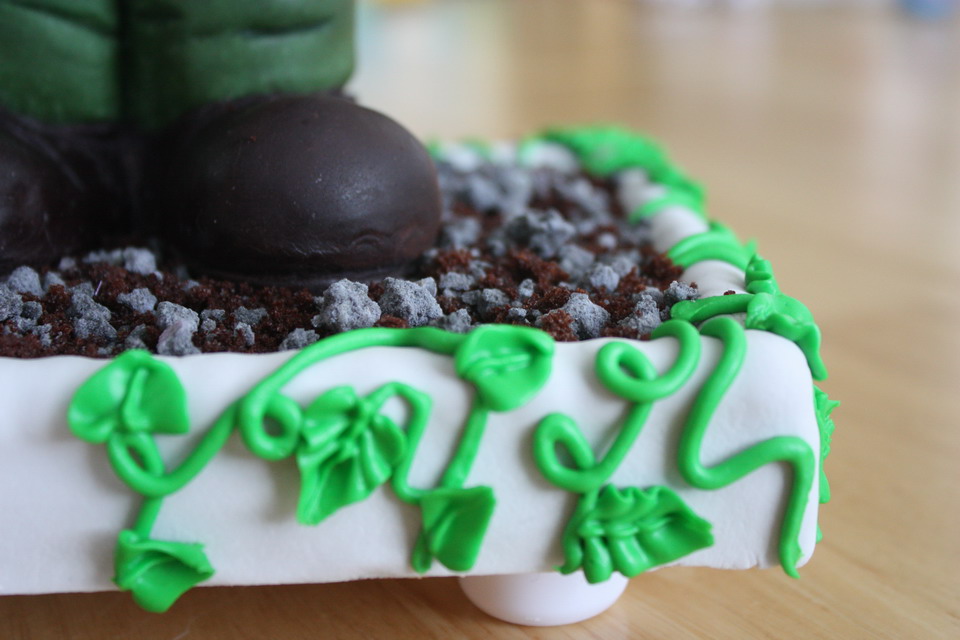
With some green royal icing, I piped vines (Wilton tip #3 and #4) and leaves around the "planter". I don't particular like the leaf tip I used (I forget which number it is). The shape is prone to break off the leaf at the end. I jammed a modeling tool into the tip to spread the metal end a little and that helped.


A while back I made some chocolate cupcakes and I used my food processor to break 3 of them into crumbs for the soil. I put these crumbs back into the oven for another 25 minutes on 250 to dry them out. The gravel is actually Carbon Dulce (a.k.a. Coal Candy) that I made back at Christmas-time using the recipe from Sprinkles Bakes. Looks real, doesn't it??? I just loved how it turned out ... and the cake crumbs made it smell really good.
Well ... that's it! Piece of cake, huh? Heh ...


Your garden gnome is so awesome! It's such a shame that you didn't win cos in my eyes, he is a winner! The details are just incredible! I love that you added step by step photos to show the progress and i can only imagine how much time you have spent over making it!! Every single details that you have put in there is perfect! :)
ReplyDeleteWOW - he is amazing! I can't believe you weren't placed...you got first place in my eyes. The amount of work and detail is unbelievable. Such brilliant, brilliant work. Well done. Thanks so much for sharing the step by step - it really makes it clear just how much time and effort went into producing this little chap.
ReplyDeleteWow...I'm shocked you didn't win!!
ReplyDeleteVery impressive work, love your photos detailing the process.
Whoa! That is the coolest garden gnomes I have ever seen. I would like to make an army of them and put them out throughout the neighborhood just for kicks.
ReplyDeleteI saw ur cake @ the show & loved it! I'm attempting a gnome cake this weekend... hope mine goes as well. Thanks for the tutorial ;-)
ReplyDeleteCarrie
Southeast Texan Cake Angel
such cute cake, really resembles the cake!
ReplyDelete